I cannot believe it is already September 1! Time has really flown by this year. We are already approaching the Fall months and I could not be more excited! Myself and 7 of my best blogging friends have come together to bring our readers the #FallFabFest! Each week, on Thursdays, a new theme will be introduced for the week. We will be bringing you blog and social media post related to the themes. At the end of the week we will choose a winner from those who participate with us!
Now onto the post!!
I love getting my home all Fall-Feeling. When I think about Fall I think about texture and deep colors. I'm believe that you can decorate for Fall by simply adding some texture and it doesn't have to be the traditional orange and browns and pumpkins. (Not that there is anything wrong with that)
I have been seeing these yarn hangings all around the blogosphere. My friend, Carli, recently did a yarn hanging for her daughter and I thought it turned out adorable so I wanted to try one myself. I have to admit, I'm not fully convinced if I like mines yet or not, but we will see how I feel in a couple of weeks about it.
This project took about a hour to complete and cost me about $12.00.
Supplies:
Branch/Stick
Yarn

The stick I used was something I had lying around the house from a faux stick arrangement and I found the yarn on clearance at Hobby Lobby. I purchase two packs of black, two packs of white and one pack of gray. The yarn was the chunky kind so it made the cost a little higher than normal. The white yarn was the dye-able kind.
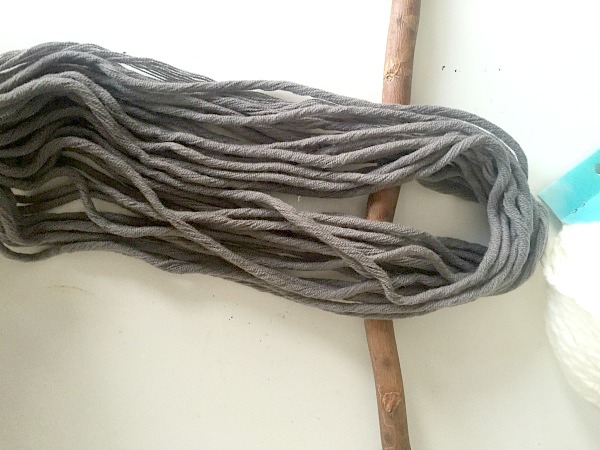
I started by determining how long I wanted my hanging. I wanted it pretty long so to keep everything consistently sized I begin to wrap the yarn. I had to use the supplies I had on hand (my hand and big toe) I wrapped by looping the yarn around my toe and then bringing it up to my arm that was out stretched. I did this about 15 times.
When I finished looping I cut the strings on one side. I wasn't able to capture photos of this so I hope I'm explaining it well. If not, reach out to me and I'm happy to provide additional information.
After doing that I looped the half of the yarn that wasn't cut around a stick. I looped and then knotted.
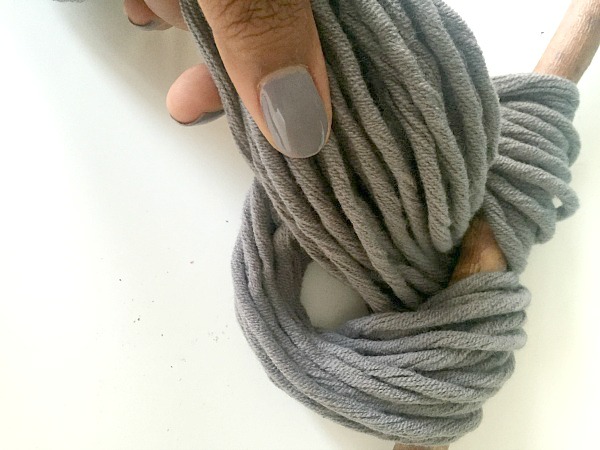
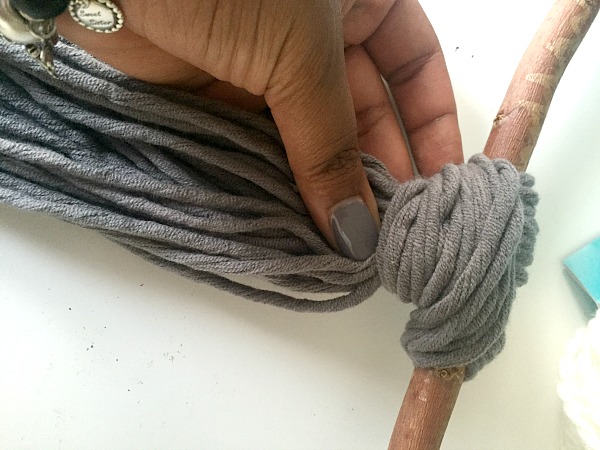
I did three gray knots, six white knots and four black knots. I took another piece of yarn and used it for hanging my wall decor.

And then it was complete. It is now hanging in my living room. My daughter gave me an A+ and my boyfriend wasn't too sure what to make of it lol!

Will you be giving this project a try? If you do please let me know.
Also, check out some of the post coming in for #FABFALLFEST by searching the hashtag on Instagram or clicking HERE.
If you enjoyed this post, please subscribed to my feed by entering your email address on the top right hand of the sidebar!
Now onto the post!!
I love getting my home all Fall-Feeling. When I think about Fall I think about texture and deep colors. I'm believe that you can decorate for Fall by simply adding some texture and it doesn't have to be the traditional orange and browns and pumpkins. (Not that there is anything wrong with that)
I have been seeing these yarn hangings all around the blogosphere. My friend, Carli, recently did a yarn hanging for her daughter and I thought it turned out adorable so I wanted to try one myself. I have to admit, I'm not fully convinced if I like mines yet or not, but we will see how I feel in a couple of weeks about it.
This project took about a hour to complete and cost me about $12.00.
Supplies:
Branch/Stick
Yarn
The stick I used was something I had lying around the house from a faux stick arrangement and I found the yarn on clearance at Hobby Lobby. I purchase two packs of black, two packs of white and one pack of gray. The yarn was the chunky kind so it made the cost a little higher than normal. The white yarn was the dye-able kind.
When I finished looping I cut the strings on one side. I wasn't able to capture photos of this so I hope I'm explaining it well. If not, reach out to me and I'm happy to provide additional information.
After doing that I looped the half of the yarn that wasn't cut around a stick. I looped and then knotted.

I did three gray knots, six white knots and four black knots. I took another piece of yarn and used it for hanging my wall decor.

And then it was complete. It is now hanging in my living room. My daughter gave me an A+ and my boyfriend wasn't too sure what to make of it lol!
Will you be giving this project a try? If you do please let me know.
Also, check out some of the post coming in for #FABFALLFEST by searching the hashtag on Instagram or clicking HERE.
If you enjoyed this post, please subscribed to my feed by entering your email address on the top right hand of the sidebar!
