Modern Thanksgiving Tablescape

If you are anything like me, you suffer from a bit of procrastination. and... if you're anything like me, you work best under the pressure that results from procrastination. We are a few days out from Thanksgiving and I'm trying to get my home ready for my family and friends. Today I want to share how I put together my last minute tablescape. 

#Thanksgiving #Tablescape #BehindtheBigGreenDoor

First things first you have to determine if you will be doing a tablecloth or a runner. I opted for a tablecloth and actually used fabric I received as a birthday gift. You will need to decide this upfront since much of your design will revolve around your choice.

Next, your guest will need something to eat off of and drink from. I picked up some silver square chargers and small dessert plates from At Home. I created a layered look by adding white plates I had on hand to the mix. I love mixing up shapes.

#Thanksgiving #Tablescape #BehindtheBigGreenDoor

Next I visited Goodwill to pick up some glasses. Thrift stores are great for unique glasses....and because I tend to lean away form matching sets, it works perfect for me. I found two short glasses and two tall ones for $.99 a piece. I added these glasses to my gold ones from my Fall Bar Station.

#Thanksgiving #Tablescape #BehindtheBigGreenDoor

#Thanksgiving #Tablescape #BehindtheBigGreenDoor

I also added some candles that I had from my mother's birthday party. They are plain white candles from dollar tree, but if you want to get jazzy you can add liquid gold leaf to them.

#Thanksgiving #Tablescape #BehindtheBigGreenDoor

#Thanksgiving #Tablescape #BehindtheBigGreenDoor

Remember my Fall floral arrangement I put together? Well, I updated it with greenery from my local Kroger. Now-a-days I skip the flowers all together, they die too fast for me. I like to add plants by adding greenery. (Next month I'll change my mind and I'll be back on flowers) I found some baby breaths and branches on clearance and put them all together.

#Thanksgiving #Tablescape #BehindtheBigGreenDoor

#Thanksgiving #Tablescape #BehindtheBigGreenDoor

Lastly, I set my arrangement on a gold baking sheet that I found at the thrift store for $1.00. 

#Thanksgiving #Tablescape #BehindtheBigGreenDoor

IN SHORT, HERE ARE MY TIPS:

1. Use alternatives to tableclothes such as scarves or fabric
2. Go for the mix and match look with unique glasses
3. Skip the flowers and add natural looking greenery
4. Use unconventional items as part of your tablescape
5. Lastly, add candles

#Thanksgiving #Tablescape #BehindtheBigGreenDoor

Did you like this post? If so consider subscribing to my post to stay up to date on all this BBGD! Also, don't forget to pin your favorite image to your pin boards! 

I teamed up with my friends to share inspirations. Check out the other host below:

Whitney J Decor: Simple Last Minute Tablescape Ideas
Fearfully & Wonderfully Made: Easy Last Minute Thanksgiving Tablescape

Also, Check out some other great tablescapes below!


DIY: Light Up Holiday Sign

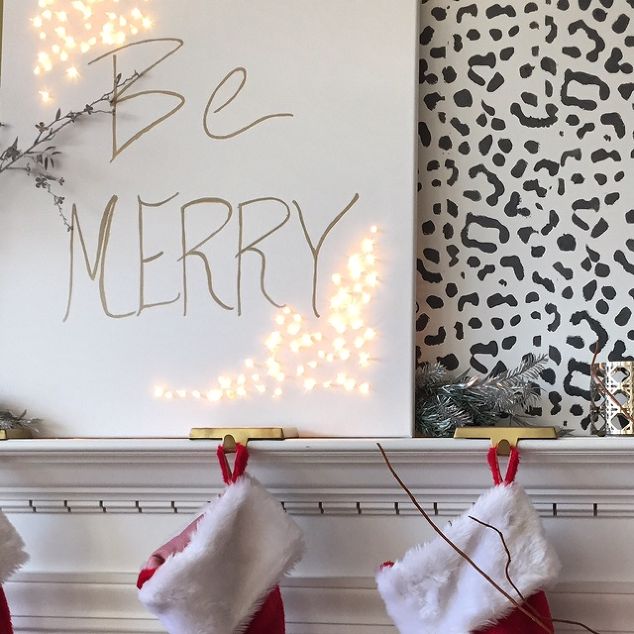
Last year I shared with you my Christmas Mantel. It was really simple to put together and I think it'll make another appearance this year! I've gotten a couple question on how I made my light up sign so today I'm going to share the deets. It's super simple!

DIY: Light Up Holiday Sign

Supplies:
Pencil
Gold Marker
String of Lights
Canvas
Screwdriver
Tape

This is great to do if you have a extra string of lights laying around or if you just want to add some Christmas jazz to your house!

How To:

Start with your lights and get them untangled.

DIY: Light Up Holiday Sign

On your canvas sketch out the wording that you want. It faint here but I wrote "Be Merry." Use your gold marker to trace over your quote.

DIY: Light Up Holiday Sign

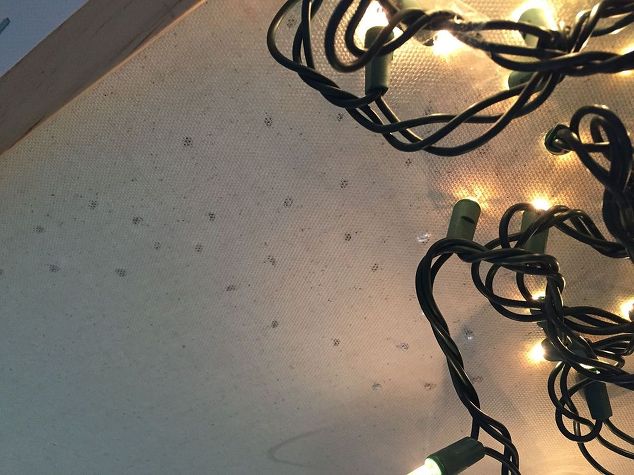
On the back of your board. Make small dots. These dots will be where your lights will show on the front. Don't make them too close together or too far apart. I did dots in the top left and bottom right corners.

Once you finish, use a screwdrive to create holes where your dots are, and lastly push the light bulbs through.

DIY: Light Up Holiday Sign

You may want to have some tape laying how to help secure the lights. Lastly, use your gold marker to trace over your lettering in the front.

DIY: Light Up Holiday Sign

DIY: Light Up Holiday Sign

DIY: Light Up Holiday Sign

Did you enjoy this post? If so, please consider subscribing to my newsletters. Also, don't forget to pin the image below to your Pinterest board for future use!

DIY: Light Up Holiday Sign

Outdoor Holiday Decor Tour

Tis the season for Christmas decor! Too soon? Nope, not all at. We've been counting down the days to getting our home Christmas ready. This year we started in the front yard. My daughter was super excited. I have to be honest, I have not always been the Christmas person...actually my family calls me 'The Grinch' (lol, more on that later in the post.) 

This year I wanted to go with a classy chic theme. When I think of classy chic I think of whites and metallic. I like to use clear lights when doing this theme because it gives everything a great polished look. 

#BigLotsHoliday #HolidayDecorTour #ad #shop #BBGD

I first tackled my front door area. I love this beautiful wreath. Flocked trees are all the rage right now, so I was pleasantly surprised to find this beautiful teardrop wreath. In going with my theme I added a shimmering snowflake doormat. I layered it onto of the mat I already have. 


#BigLotsHoliday #HolidayDecorTour #ad #shop #BBGD

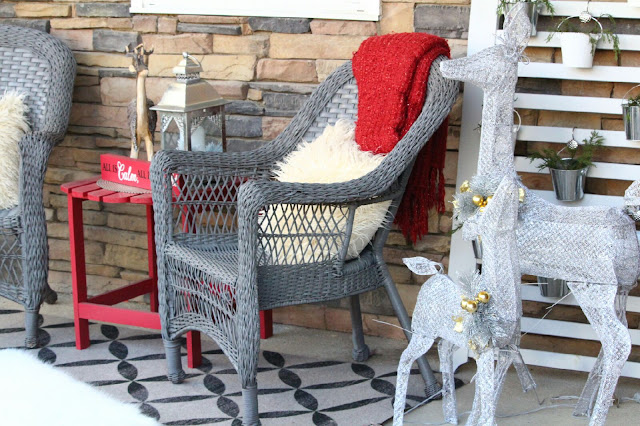
To the left of my front door you will find my vertical garden, chairs, rug and table. I updated my vertical garden with tree clippings.

#BigLotsHoliday #HolidayDecorTour #ad #shop #BBGD


I dug through my storage closet and founds some pillows and a throw placed over my chair and added a fluffy rug.

#BigLotsHoliday #HolidayDecorTour #ad #shop #BBGD

Next I added a pair of light up deer. It came in a two piece set of the baby and momma. They easily fit into my classy chic theme. I added them right beside my chair and they look great on the porch. My daughter was so helpful in putting these together. It was super easy!

#BigLotsHoliday #HolidayDecorTour #ad #shop #BBGD

On my table I put together a small vignette. The main thing to keep in mind when creating this is to mix and match complementing items and decor. I like to make these displays in odd numbers and I search for a short item, tall item and wide item. In addition, I like to mix textures and colors. Here I have a metal, wood and a pop of red color. This silver place mat was a great foundation for my display. 

#BigLotsHoliday #HolidayDecorTour #ad #shop #BBGD

#BigLotsHoliday #HolidayDecorTour #ad #shop #BBGD

Outside of our home we have 4 pillars. We wrapped them in pre-lit garland and added a bow to the three front pillars. I thought this was the perfect touch as it really frames the patio.

#BigLotsHoliday #HolidayDecorTour #ad #shop #BBGD


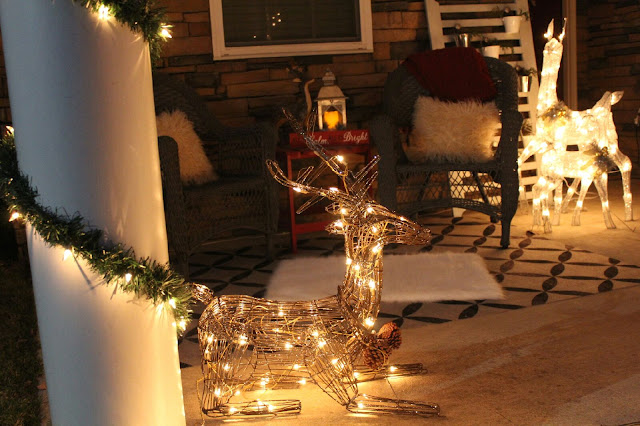
We also added another brown pre-lit deer to the far corner of the patio and used ribbon lights in front of the patio.

#BigLotsHoliday #HolidayDecorTour #ad #shop #BBGD

#BigLotsHoliday #HolidayDecorTour #ad #shop #BBGD

Get a look at the space at night. We truly love the lights!

#BigLotsHoliday #HolidayDecorTour #ad #shop #BBGD

#BigLotsHoliday #HolidayDecorTour #ad #shop #BBGD

#BigLotsHoliday #HolidayDecorTour #ad #shop #BBGD

#BigLotsHoliday #HolidayDecorTour #ad #shop #BBGD

Now if you have any question in your mind if I am still The Grinch or not, I think from this post you know that the answer is NO! Having my little one truly gave me an appreciation for the holiday. There's nothing like watching my daughter's eyes light up when she talks about Christmas. I had no choice but to get involved, and gladly so at this point. 

So will you be decorating outside for the holidays? If so, let me know your plans.